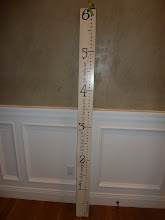
1. Measure and make small pencil marks where the bottom of vinyl lettering will be place.
2. Turn vinyl lettering face down on a flat surface. With a credit card or library card rub the back of paper to make vinyl stick to the transfer tape.
3. Slowly peel away backing paper. 4. Once the vinyl is stuck to the transfer tape only, take the vinyl and place in where it will be applied. It can be lightly tacked down to check the placement. Once you are sure about placement use the credit card and rub as before to apply.
5. Lastly slowly peel away the transfer tape from the vinyl to make sure it is sticking. 6. Done and Enjoy!
* To Remove: Use a blow dryer on LOW heat (for a short time) over the vinyl to help remove it easier and quicker.
_______________________________________
How to finish the Magnet Boards:
Option 1: Wood, Metal and Vinyl1. Paint the edges and one inch around the top of board. You may paint the back if you would like.
2. Once paint is dry, sand the edges of wood.
3. Take your 12x12 paper, then using spray adhesive apply paper to metal. Works best if you spray the glue on metal and then place paper on top. The paper will stick as soon as it touches the glue, so don't trim the paper until after it has been placed on metal.
4. Once dry, apply a layer of mod podge to protect the paper.
5. Once the mod podge is dry, then apply the vinyl to paper. 6. With a hammer and nails apply the metal to the wood through the pre-drilled holes.
Option 2: Metal and Vinyl
1. Follow above first 5 steps.
2. Then if hanging on a fridge attach magnets to the back using industrial stregth glue (E-6000). *You can also use command strips. Option 3: Vinyl only
1.Apply vinyl to your fridge and use it as your magnet board. You may also want to use dry erase pens to write in names for FHE board and Job Chart. _______________________________________
How to finish the Square Blocks:
1. Paint or stain your blocks.
2. Once dry, sand the edges of the blocks.
3. Cut scrapbook papers 1/8” to 1/4” smaller than the wood blocks.
4. Then apply papers to the block with mod podge.
5. Once mod podge is dry, apply the vinyl.
_______________________________________
How to finish the Alphabet Blocks:
1. Paint or stain your blocks.
2. Once dry, sand the edges of the blocks.
3. Cut scrapbook papers 1/8” to 1/4” smaller than the wood blocks.
4. Then apply papers to the blocks with mod podge.
5. Once mod podge is dry, apply the vinyl.
_______________________________________
How to finish the Look what I did boards:
1. Paint the sides and front of board.
2. Once paint is dry, sand the edges of the wood.
3. Apply the metal to wood with a hammer and nails.
4. Lastly, apply the vinyl to the wood board.
______________________________________
How to finish the Monogram Name boards:
Option 1: Initial, name and established year
1. Paint the sides and front of 7 ½ x 7 ½ inch board, then paint the sides and 1 inch of the front of the 12x12 inch board.
2. Once paint is dry, sand the edges of the wood.
3. Cut scrapbook papers 1/8” to 1/4” smaller than the 12 x 12 wood.
4. Apply the paper to the 12 x 12 inch wood with mod podge.
5. Apply the vinyl to the smaller wood board.
6. Once the mod podge is dry apply the smaller board to center of 12x12 board using wood glue.
Option 2: Initial, name, and baby inforation.
1. Follow above first 6 steps.
2. Then apply the vinyl baby information to the 12x12 paper.


